There’s a difference between a clean house and a truly clean house. The first one looks fine — surfaces are wiped, floors are done, dishes are put away. The second one has had attention paid to the refrigerator coils, the grout lines, the inside of the oven, the dust collecting on the blades of the ceiling fan, and the buildup around the bathroom caulking that no amount of surface wiping will ever touch.
Most homeowners clean regularly but deep clean rarely — and the gap between the two is where allergens breed, odours develop, and surfaces quietly deteriorate. A thorough deep clean twice a year, with targeted room refreshes in between, makes a measurable difference to how your home looks, smells, and feels, and to the long-term condition of your surfaces, fixtures, and appliances.
This guide covers every room in the house. It’s built for homeowners who want to do it properly — not just tick boxes, but understand what they’re cleaning, why it matters, and how to do it in a logical order that doesn’t waste time or effort.
Before you start: the principles that make deep cleaning faster
Deep cleaning done without a system takes twice as long and still misses things. Three principles make the difference.
Always work top to bottom. Dust, debris, and cleaning spray all fall downward. If you clean your floors before you dust the ceiling fan or wipe down the upper cabinets, you’ll be cleaning the floor twice. Start at the highest point in every room — light fixtures, crown moulding, ceiling fans — and work systematically down to the baseboards and floors.
Clean from dry to wet. Do dry tasks first — dusting, vacuuming, decluttering — before introducing moisture. Wiping dusty surfaces with a wet cloth creates a muddy film that’s harder to clean than either dust or a wet surface alone.
Let cleaning products work. The biggest time-wasting mistake in deep cleaning is spraying a product and immediately wiping it. Most bathroom cleaners, degreasers, and disinfectants need 5 to 10 minutes of contact time to be effective. Spray first, move to another task, come back to wipe. You’ll get better results with less scrubbing effort.
Gather everything before you start. A deep clean that keeps stopping because you need to find a product or a cloth loses significant momentum. Before starting any room, have your microfibre cloths, relevant cleaners, scrubbing tools, and a rubbish bag within reach.
How often should you deep clean?
The honest answer depends on your household, but here’s a practical baseline:
- Kitchen: Once a month for major appliance cleaning; full deep clean every 3 months
- Bathrooms: Full deep clean every 2–3 weeks; more frequently with heavy use
- Bedrooms: Full deep clean every 2 months; linens weekly
- Living areas: Every 1–2 months for full deep cleaning
- Laundry room: Every 2–3 months
- Whole home: A full top-to-bottom deep clean twice a year — typically spring and autumn
Households with children, pets, or allergy sufferers should increase frequency at the higher-contact rooms, particularly bathrooms, kitchens, and bedrooms.
Kitchen
The kitchen earns the most attention of any room in the house. It’s where grease builds on surfaces daily, where food residue accumulates in ways you don’t notice until it becomes an odour problem, and where appliances operate under conditions that cause internal buildup over time. A clean-looking kitchen surface and a genuinely clean kitchen can be very different things.
Appliances: inside and out
Oven: Self-clean mode sounds convenient but produces significant smoke and heat that can set off smoke alarms and strain the oven’s components. A paste of baking soda and water spread over the interior and left overnight, then wiped away and followed by a spray of white vinegar to dissolve residue, is more effective and gentler on the oven than the self-clean cycle. Don’t forget the oven door glass — baking soda paste works well there too, applied with a damp cloth and buffed off.
Refrigerator: Remove every item, shelf, and drawer. Wash removable shelves and drawers in warm soapy water — not in the dishwasher, as the thermal shock can crack glass shelves. Wipe the interior walls with a solution of baking soda and warm water (about one tablespoon per litre). Check expiry dates as you go, and wipe down every item before replacing it. Clean the door seals with an old toothbrush dipped in warm soapy water — this is where mould begins in refrigerators. Pull the fridge away from the wall and vacuum the coils at the back or bottom; dusty coils make the refrigerator work harder and use more energy.
Dishwasher: Remove the filter from the base, rinse it under running water, and scrub gently with a soft brush. Wipe down the door seal and the spray arms. Run an empty cycle with a cup of white vinegar on the top rack, followed by a cycle with baking soda scattered across the bottom.
Microwave: Fill a microwave-safe bowl with water and a few slices of lemon (or a splash of white vinegar), microwave on high for 3 minutes, then let it sit for another 5 with the door closed. The steam loosens splattered residue so it wipes away with minimal effort.
Range hood filter: Grease accumulates in range hood filters faster than most homeowners realise. Remove the filter and soak it in hot water with a generous squirt of dish soap and a cup of baking soda for 10 minutes. Scrub with a stiff brush, rinse, and allow to dry fully before replacing.
Cabinets and drawers
Empty cabinets and drawers completely before cleaning them — this is the only way to reach the back corners and underneath accumulated items. Wipe interior surfaces with a damp microfibre cloth and mild all-purpose cleaner. As you replace items, remove anything out of date, broken, or unused. Wipe the exterior cabinet fronts with a degreasing cleaner, paying particular attention to the area around handles where oils from hands build up heavily.
Countertops and backsplash
Different countertop materials need different care. Granite and natural stone should be cleaned with pH-neutral cleaners — vinegar and lemon are acidic enough to etch natural stone surfaces over time. Quartz is more durable but still shouldn’t be cleaned with harsh abrasives. Laminate tolerates most household cleaners but can be damaged by prolonged water exposure.
The backsplash deserves more attention than it usually gets. Grout lines between tiles absorb cooking grease and residue. Apply a grout cleaner or a paste of baking soda and water, let it sit for 10 minutes, then scrub with a stiff-bristled brush. Rinse thoroughly.
Sink and drain
Scrub the sink basin with a baking soda paste, paying attention to the area around the drain and the junction between the basin and the counter where residue accumulates. Clean the faucet and faucet base with an old toothbrush — this is where limescale builds on hard water and where food residue collects around the base.
For the garbage disposal: put a handful of ice cubes inside, run the disposal to break up any debris on the blades, then drop in half a lemon and run again with cold water. This handles both cleaning and deodorising in one step.
Overlooked kitchen areas
The top of the refrigerator accumulates a layer of grease and dust that becomes a remarkably unpleasant combination in most kitchens. Wipe it down every deep clean. Light switch plates and outlet covers near cooking areas are constantly touched with hands that have handled food and cooking oils — wipe them down with a disinfectant. The kickboard at the base of cabinets collects a surprising amount of debris; a vacuum attachment handles this efficiently.
Bathrooms
Bathrooms are the highest-germ environment in the house and visibly reward thorough cleaning faster than any other room. The key is not just cleaning the visible surfaces but addressing the places where mould, soap scum, and bacteria accumulate beneath the surface.
Spray all surfaces — toilet, sink, tub or shower — before you do anything else. Let the cleaning products sit and work while you do the dry tasks.
Shower and bath
Soap scum on tiles is a combination of soap residue, body oils, and hard water minerals. White vinegar diluted with equal parts water, left on tiles for 5 minutes before scrubbing, handles most soap scum effectively. For heavy buildup, commercial bathroom cleaners with citric acid are more effective.
Grout is the most neglected surface in the bathroom. Apply a paste of baking soda and water directly to grout lines, spray with white vinegar (it will fizz — that’s fine and helpful), let it sit for 10 minutes, then scrub with a stiff grout brush. This is labour-intensive but makes an enormous visual difference. Resealing grout annually after cleaning prevents staining and mould penetration.
The showerhead accumulates mineral deposits that reduce water pressure and can harbour bacteria. Fill a plastic bag with undiluted white vinegar, tie it around the showerhead so the head is submerged, secure with a rubber band, and leave for 30 minutes to an hour. Rinse thoroughly with hot water and run the shower briefly.
The shower curtain and liner, if fabric, can usually be washed in the washing machine on a warm cycle with regular detergent and a cup of white vinegar. Do this every 1–2 months.
Toilet
Clean the toilet in this order: inside the bowl first (apply cleaner, let it sit while you clean everything else), then the exterior — top of the tank, handle, entire outside of the bowl, base of the toilet, and the floor around it. The area around the base of the toilet is where bacteria accumulates unseen and is frequently missed in regular cleaning.
Under the toilet rim is where the most significant bacterial buildup occurs in toilets. Use a toilet brush or specifically shaped cleaning tool to clean thoroughly under the rim with every deep clean.
Sink and vanity
Remove everything from the vanity surface and wipe it completely down. Clean the faucet with a toothbrush around the base where residue collects. Check under the sink: wipe down the inside of the cabinet and inspect the pipes for any slow drips that may have left water stains or mould.
Organise the medicine cabinet or vanity storage while it’s empty — remove expired products, consolidate duplicates, and wipe down every shelf before replacing items.
Ventilation fan
The bathroom exhaust fan is almost universally ignored in regular cleaning and quickly accumulates a thick layer of dust and lint that reduces its effectiveness. Turn off the power at the circuit breaker, remove the cover, and wash it in warm soapy water. Vacuum dust from the fan mechanism with a narrow attachment. This fan is responsible for removing the moisture that causes mould — a clogged fan is a mould risk.
Bedroom
The bedroom is where you spend roughly a third of your life, and the surfaces here have direct contact with your skin for hours each night. Dust mites, skin cells, and allergens accumulate in bedding and mattresses at rates most people would find alarming if they thought about it. A thorough bedroom deep clean is a genuinely meaningful health measure.
Mattress and bedding
Strip the bed completely. Wash all bedding — sheets, pillowcases, duvet cover — at 60°C or above to kill dust mites effectively. Wash the actual duvet and pillows at least twice a year; check care labels, but most can handle a gentle machine wash on a warm cycle with an extra rinse.
The mattress itself: vacuum the entire surface using the upholstery attachment, paying particular attention to seams and tufting where dust and skin cells collect. For freshening and deodorising, sprinkle a light layer of baking soda over the mattress, let it sit for 30 minutes to an hour, then vacuum thoroughly. Flip or rotate the mattress every 6 months to extend its life and ensure even wear.
Furniture and surfaces
Dust collects on flat surfaces but also on the vertical faces of headboards, the undersides of shelves, and the backs of furniture. A microfibre duster or cloth handles most of this; electrostatic cloths trap rather than redistribute dust.
Wipe down all hard surfaces — nightstands, dressers, bedside tables — with a damp microfibre cloth after dusting. Don’t forget the tops of wardrobes and behind furniture pieces that rarely get moved. The area behind the headboard accumulates more dust than almost any other surface in the bedroom.
Under the bed and in the wardrobe
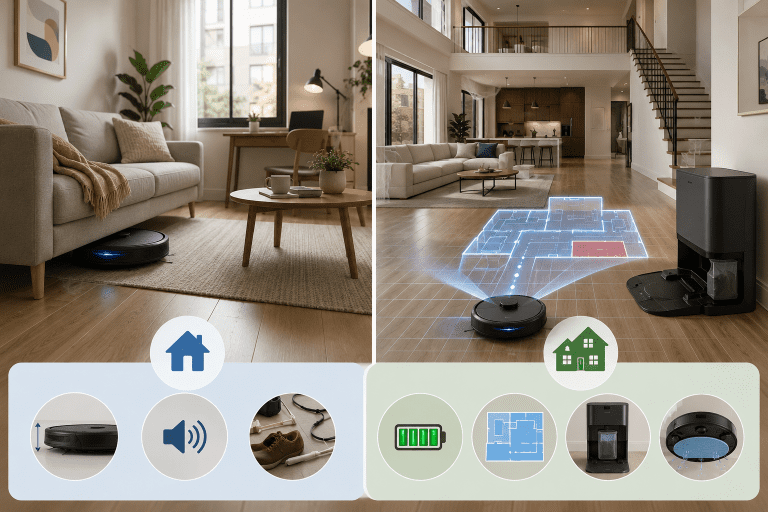
Under the bed is where dust bunnies grow undisturbed. Move the bed if possible (or at minimum use the vacuum’s wand attachment as far under as it reaches), and vacuum the floor completely. A robot vacuum running daily significantly reduces the under-bed accumulation between deep cleans, but it won’t reach the full depth under low-clearance beds.
Empty the wardrobe completely at least once a year during a deep clean. Vacuum the floor, wipe the shelves, and use this opportunity to sort items into keep, donate, and discard piles. Replace items with adequate spacing — a wardrobe tightly packed with clothes creates conditions where odour and mildew develop in the fabric.
Windows and soft furnishings
Wipe window sills and frames with a damp cloth. Clean windows with an ammonia-free glass cleaner and a microfibre cloth, working in a circular motion to avoid streaks. Vacuum curtains with the upholstery attachment, or launder them according to care labels. Wipe down all light switch plates and door handles with a disinfectant wipe.
Living Room
The living room accumulates a different kind of dirt than kitchens and bathrooms — less bacteria, more dust, fabric contamination, and the gradual buildup on high-touch surfaces that gets overlooked in regular cleaning.
Upholstery and soft furnishings
Sofas and armchairs need more attention than they typically receive. Remove all cushions and vacuum the cushion surfaces, the seams, and beneath the cushions where crumbs, hair, and debris collect. Vacuum the sofa body, including underneath the seat cushions and along the back and arms. For fabric sofas, a fabric-specific cleaner applied with a soft brush handles surface staining. For leather, a dedicated leather cleaner followed by conditioner preserves the material and prevents cracking.
Throws and decorative cushion covers should be washed according to their care labels — most are machine washable. Do this at every deep clean.
Hard surfaces and electronics
Dust electronics carefully — televisions, speakers, gaming consoles, and their cable arrangements accumulate significant dust that can cause overheating over time. Use a dry microfibre cloth or specifically formulated electronics duster spray for screens. Never use a wet cloth on any electronic component.
Wipe remote controls with a disinfectant wipe — they’re among the most-touched surfaces in the house and among the least frequently cleaned. Keyboard trays, coffee table surfaces, and lamp bases all benefit from a proper wipe-down at each deep clean.
Walls, baseboards, and often-missed surfaces
Walls accumulate a film of dust and cooking residue (especially in open-plan homes near the kitchen) that makes them look duller over time. A dry microfibre cloth gently wiped along walls from top to bottom removes this without damaging paint. For marks and scuffs, a magic eraser or mild soap solution handles most painted walls.
Baseboards are one of the most commonly missed surfaces in regular cleaning and one of the most visually impactful to clean properly. Wipe them down with a damp cloth, getting into corners and behind furniture where dust compacts. A dryer sheet rubbed along baseboards after cleaning creates a light anti-static layer that repels dust for longer between cleans.
Doorknobs, light switches, and remote controls are among the highest-touch and lowest-frequency-cleaned surfaces in any home. Disinfect all of these at every deep clean.
Laundry Room
The laundry room is the room most homeowners forget entirely during a deep clean — which means it’s often the room with the most accumulated grime.
Washing machine
Front-loading washing machines are prone to developing mould and unpleasant odours in the rubber door gasket. Inspect the gasket carefully and wipe it out with a bleach solution (1 tablespoon of bleach in 1 litre of water) on a regular basis. Leave the door ajar after every wash cycle to allow the drum to dry out.
To deep clean the drum: run a hot empty cycle with two cups of white vinegar directly in the drum (not the dispenser). Follow with a second hot empty cycle with half a cup of baking soda in the drum. Wipe the drum dry and leave the door open.
For top-loading machines: fill the drum with hot water, add two cups of white vinegar and half a cup of baking soda, let it agitate for a minute, then pause the cycle and allow it to soak for 30–60 minutes before completing the cycle.
The detergent dispenser is frequently overlooked and accumulates a significant buildup of detergent residue and mould. Remove it (most pull straight out), soak in warm soapy water for 10 minutes, and scrub before rinsing and replacing.
Dryer
Clean the lint trap filter after every single load — not every few loads, every load. A clogged lint trap is a fire risk and also dramatically reduces drying efficiency. Every 3–6 months, clean lint accumulation from the lint trap housing (not just the removable filter) using a narrow vacuum attachment or a dryer vent brush.
The dryer vent that exits through the wall or roof accumulates lint and should be professionally cleaned annually. This is not cosmetic — a blocked dryer vent is one of the leading causes of house fires in residential buildings.
Wipe down the exterior of both the washer and dryer, including the tops (which become surfaces in most laundry rooms), the sides, and the area around the control panels where detergent splashes accumulate.
Home Office
The home office has become one of the most-used rooms in many households and one of the least-cleaned.
Technology and desk surfaces
Computer keyboards harbour bacteria at levels that would horrify most users if tested. Turn the keyboard upside down and gently tap it to dislodge debris. Use compressed air to blow out material from between keys. Wipe the keycaps with an isopropyl alcohol wipe (70% concentration is ideal — it cleans and disinfects without leaving residue or damaging the keys).
Monitor screens should be cleaned with a microfibre cloth — dry first, then barely dampened if needed. Never spray any liquid directly onto a screen.
Wipe the entire desk surface, including the areas under the monitor stand and keyboard that rarely get touched in routine cleaning. Clean the mouse, chair armrests, and any regularly touched surfaces with a disinfectant.
Cable management: a deep clean is a good opportunity to organise and secure cables that have accumulated into a tangle. Cable ties or clips from any hardware store take a few minutes and make the space noticeably cleaner.
Hallways, Stairs, and Overlooked Transitional Spaces
These are the areas connecting every room in the house and the most frequently missed in deep cleaning plans.
Skirting boards and baseboards along hallways and stairways collect the most accumulated traffic dirt in the house. Wipe these down from the top of the staircase down, using a damp cloth.
Stair treads and risers accumulate dust and tracked-in dirt from the soles of shoes. Vacuum thoroughly, then wipe the risers (the vertical face of each step) with a damp cloth.
Door frames, doorknobs, and light switches throughout the house all benefit from a disinfectant wipe during a full deep clean. These are touched many times every day and are almost never deliberately cleaned.
The front entryway is the first thing visitors see and the place through which most outdoor debris enters the house. Wipe down the front door (inside and outside), clean the doormat, vacuum or sweep the entryway thoroughly, and wipe down the area around the door handle and letterbox.
Deep cleaning checklist at a glance
Use this as a reference to work through each room without missing anything.
Kitchen
- Clean oven interior (baking soda method)
- Clean refrigerator interior and door seals; vacuum coils
- Clean dishwasher filter and run a vinegar cycle
- Steam and wipe microwave interior
- Degrease and clean range hood filter
- Empty, wipe, and reorganise cabinets and drawers
- Scrub countertops appropriate to material
- Deep clean grout on backsplash
- Scrub sink and faucet base; refresh garbage disposal
- Wipe top of refrigerator, light switches, and kickboards
Bathroom
- Spray all surfaces before starting; let sit
- Scrub tiles and grout (baking soda + vinegar method)
- Clean showerhead with vinegar soak
- Wash shower curtain and liner
- Clean toilet inside bowl, exterior, base, and around the base
- Scrub under toilet rim thoroughly
- Clean sink, faucet base, and under-sink cabinet
- Organise and wipe medicine cabinet
- Clean and vacuum exhaust fan
Bedroom
- Wash all bedding at 60°C+
- Wash duvet and pillows
- Vacuum and deodorise mattress; flip or rotate
- Dust all surfaces top to bottom including behind headboard
- Wipe hard surfaces with damp cloth
- Vacuum under bed fully
- Empty and clean wardrobe; sort items
- Clean windows, sills, and frames
- Disinfect switches and door handles
Living room
- Vacuum sofa including under cushions and seams
- Wash throws and cushion covers
- Dust and wipe all electronics
- Disinfect remote controls and high-touch surfaces
- Wipe walls with dry microfibre cloth
- Clean baseboards; apply dryer sheet
- Disinfect all door handles and light switches
Laundry room
- Deep clean washing machine drum (vinegar + baking soda)
- Clean rubber door gasket (front-loader)
- Remove and clean detergent dispenser
- Clean dryer lint trap housing
- Schedule or conduct dryer vent cleaning
- Wipe appliance exteriors, tops, and controls
Home office
- Clean keyboard (compressed air + isopropyl wipe)
- Wipe screen with microfibre cloth
- Wipe desk surface, mouse, and chair armrests
- Organise and secure cables
Throughout the whole home
- Wipe baseboards and skirting boards in all rooms
- Disinfect all door handles and light switches
- Clean stair treads and risers
- Wipe door frames throughout
- Clean entryway, front door, and doormat
How to stay on top of it between deep cleans
The purpose of a deep clean isn’t to start from scratch every time — it’s to reset everything to a high baseline so that routine maintenance keeps it there. After a thorough deep clean, a consistent light maintenance routine means your next deep clean is significantly faster because you’re refreshing rather than restoring.
Five habits that reduce the frequency and intensity of deep cleans:
Wipe as you go in the kitchen. Wiping a stovetop and counter immediately after cooking takes 2 minutes. Degreasing a stovetop that has had a week’s cooking residue baked onto it takes 20 minutes.
Squeegee the shower after every use. A 30-second daily squeegee on shower tiles prevents the soap scum buildup that requires significant effort to remove once set.
Leave bathroom doors open after showering. Airflow reduces the moisture that causes mould and mildew. If you have an exhaust fan, run it for at least 20 minutes after every shower.
Keep floors consistently clean. Whether you use a robot vacuum running daily or maintain a regular manual vacuuming schedule, floors that receive consistent attention don’t accumulate the ground-in debris that requires aggressive deep cleaning.
Declutter before surfaces get dirty. A cluttered surface is a surface you can’t clean properly. Regular decluttering keeps cleaning efficient and prevents accumulated items from trapping dirt beneath them.
The bottom line
A thorough deep clean done properly, room by room, working systematically from top to bottom, and paying attention to the surfaces and appliances that routine cleaning never touches, makes a genuine difference to how a home looks, smells, and functions. More importantly, it removes the accumulated allergens, bacteria, and residue that regular surface cleaning doesn’t reach.
Schedule it twice a year as a deliberate block of time, work through one room at a time, and use the checklist to ensure nothing is missed. It is work — but done right, it’s the kind of work that stays done for months.