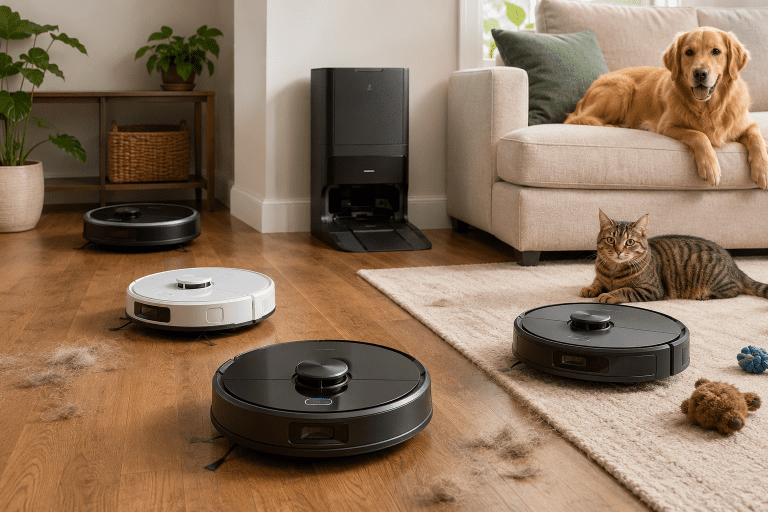
Hardwood floors are one of the most valuable investments in a home. They add character, warmth, and resale value that few other surfaces can match — which is exactly why the idea of running a robot vacuum over them every day gives some homeowners pause. What if it scratches the finish? What if the mopping function introduces too much moisture? What if something gets caught under the wheels and drags across the wood?
These are legitimate questions, and the answers are more nuanced than either the “robot vacuums are completely safe” line from manufacturers or the blanket anxiety that keeps some owners from using their machine to its full potential.
The honest answer: a well-chosen robot vacuum, used correctly and maintained properly, will not damage your hardwood floors. In fact, running one daily is one of the best things you can do for hardwood long-term, because it removes the fine grit and sand particles that act like sandpaper underfoot with every footstep. The damage risks are real but specific — and once you understand what causes them, they’re almost entirely preventable.
This guide covers every meaningful risk, the exact conditions that cause damage, and what to do about each one.
Why hardwood floors scratch in the first place
Before looking at robot vacuums specifically, it helps to understand how hardwood floors actually get scratched — because the answer shapes everything else.
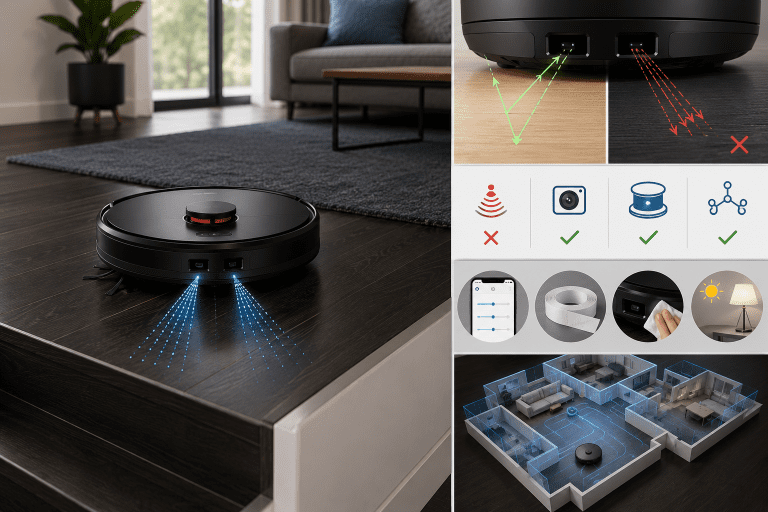
Hardwood floors don’t typically get scratched by contact with soft materials. A rubber wheel rolling across a clean hardwood surface under normal conditions creates no scratch. What creates scratches is hard particles trapped between a moving surface and the floor — grit, sand, small stones, or any hard debris that acts as an abrasive under pressure or friction.
This is why hardwood floors scratch from foot traffic, from furniture legs, from dragging objects, and from vacuums — not because the contact itself is abrasive, but because hard debris gets involved in the contact. A robot vacuum that picks up grit efficiently and keeps it away from the floor is actually protecting hardwood, not threatening it. A robot vacuum that pushes grit around, traps it in wheels, or drags it across the surface is the one causing damage.
Robot vacuums will not scratch or damage hardwood floors under normal conditions. Most are manufactured with soft brushes and rubber wheels safe for hardwood. However, damage can occur if debris like sand or small rocks gets caught in the wheels and drags across the surface.
Understanding this makes the protective steps straightforward: keep the machine well-maintained so debris can’t accumulate in wheels or brushes, choose a robot with floor-appropriate components, and use it frequently enough that grit never builds to a damaging level on the surface.
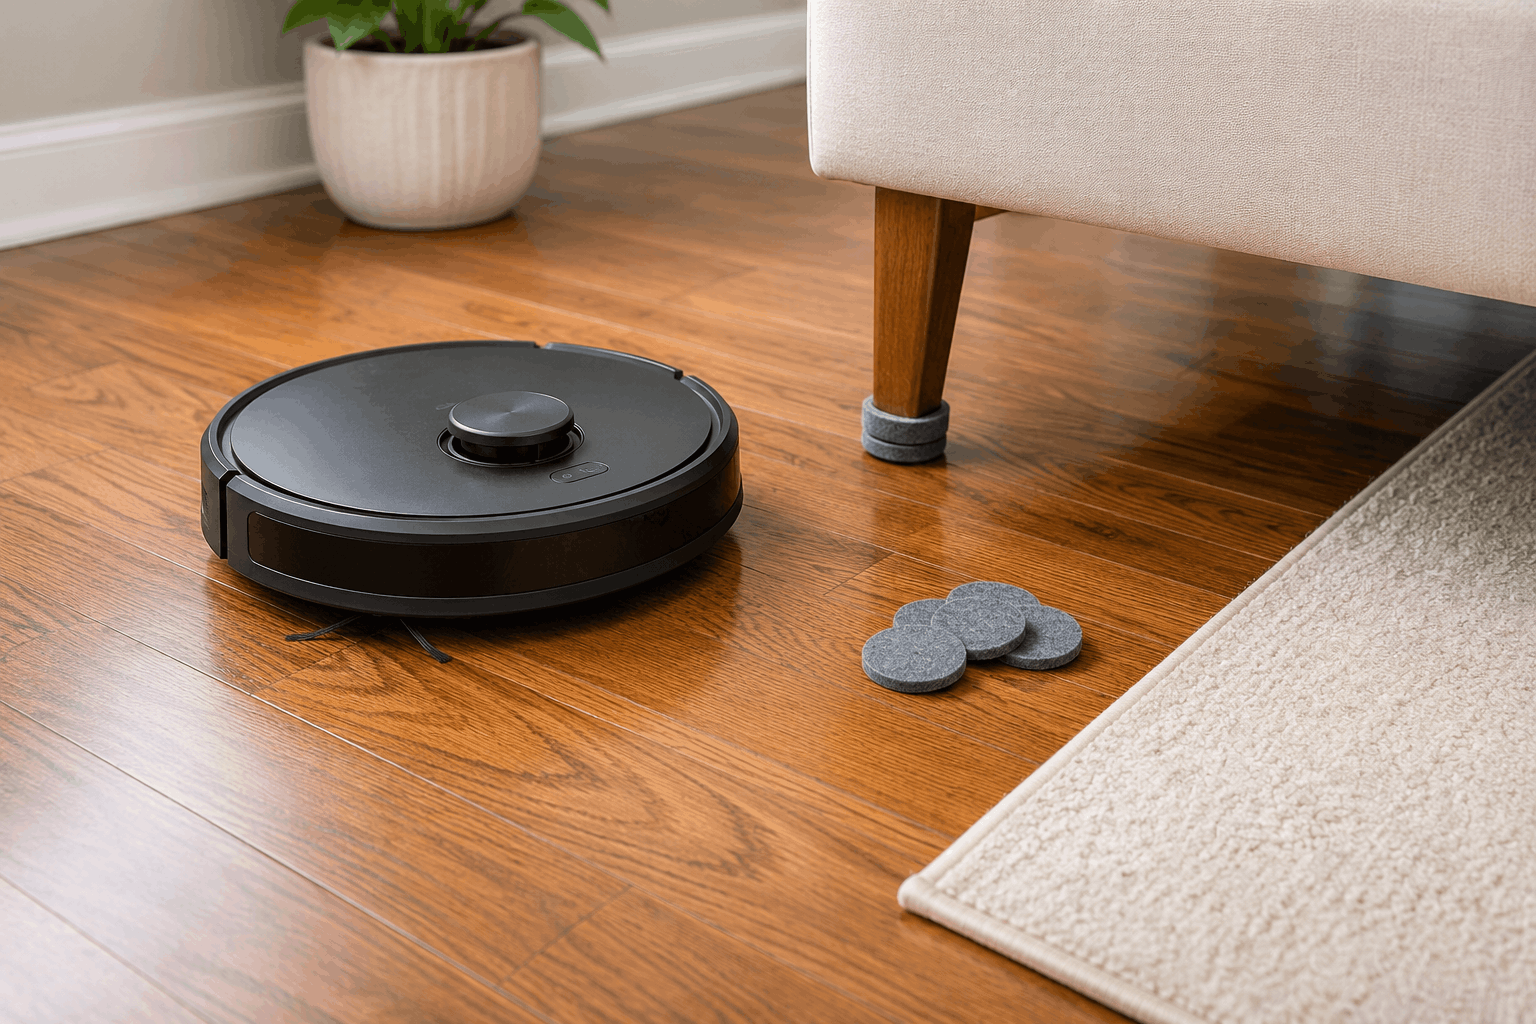
1. Debris trapped in the wheels
This is the most common cause of real-world scratching from robot vacuums, and the most preventable. The wheels on a robot vacuum — particularly the smaller front caster wheel — can trap small pieces of grit, sand, or debris in the axle housing or wheel tread. Once trapped, this debris is pressed directly against the floor surface as the robot drives across it.
One particular problem with some Roomba models is the front pivoting wheel, which is made from hard plastic, not rubber. Unlike the two rubber rear wheels, this hard plastic caster wheel rotates in every direction over the floor and can cause scratches, especially when it makes contact with debris.
What to do: Check and clean all wheels every week as part of your routine robot vacuum maintenance. Remove the caster wheel completely, clear any debris from the axle and wheel housing, and spin the wheel by hand to confirm it moves freely. Any robot vacuum with hard plastic wheels rather than rubber-coated wheels is a higher risk on hardwood — this is worth checking before you buy.
2. Stiff or damaged brushroll bristles
Side brushes that spin at high RPM on a floor that hasn’t been pre-swept can propel larger particles across the wood surface with enough force to cause fine scratches. If the bristles are too stiff, the constant friction of the brush itself can eventually dull the sheen of a high-gloss floor.
Hard bristle brushrolls — common on older models and some budget robots — create more mechanical agitation than hardwood requires and can cause micro-scratching on the finish over time, particularly on high-gloss surfaces. Rubber extractors and soft rubber-fin brushrolls are both gentler on the floor finish and more effective at channelling debris into the suction path.
What to do: For hardwood floors, rubber brushroll designs are strongly preferable to hard bristle brushes. If your robot has a bristle brushroll, check whether the model has a hard floor mode that reduces brushroll speed or lifts the brushroll entirely, relying primarily on suction. If your robot allows you to remove the brush roll entirely for suction-only mode, that is the safest way to clean wood floors.
Inspect the brushroll regularly — damaged or frayed bristles create uneven contact with the floor. Replace the brushroll when wear becomes visible.
3. Moisture damage from the mopping function
This is the second major risk category and the one most relevant to owners of combination vacuum-mop robots. The safety of a robot vacuum on hardwood depends heavily on how it handles moisture. Traditional mopping often leaves puddles that can seep between planks, causing swelling and long-term damage.
The critical distinction is between light dampness and wet mopping. A lightly dampened mop pad that deposits a fine film of moisture that evaporates within seconds is safe on sealed hardwood. A soaking wet pad that leaves standing moisture on the floor, or moisture that reaches the edges of planks where it can seep into the wood, causes the swelling and warping that damages floors permanently.
Solid hardwood, as a single piece of timber, is more sensitive to moisture. Engineered hardwood, while its layered core offers more stability, still requires care with water. Sealed floors with a protective polyurethane coat are the most tolerant, but older floors with an oil or wax finish, or visible gaps between planks, need an even gentler approach.
What to do:
- Always use the lowest moisture setting when mopping hardwood
- Use only water in the mop tank, or a pH-neutral hardwood-specific cleaner — never harsh detergents, vinegar (which is acidic enough to dull finish over time), or bleach-based products
- Run a test: after a mop cycle, check the floor within 30 seconds. If moisture is still visible after 30 seconds, your moisture setting is too high
- Disable the mop function entirely for older, oil-finished, waxed, or unsealed hardwood — these surfaces should not be wet-mopped by any method
- If the robot has a mop pad lift feature (retraction of the mop when on hard floors versus carpet), ensure this is functioning correctly
4. Grit accumulation on the floor surface
A robot vacuum that runs only once a week allows grit, sand, and tracked-in fine particles to accumulate on the floor surface between sessions. When the robot eventually runs, it is moving through a layer of abrasive particles rather than picking them up cleanly. Every pass over this accumulated grit creates micro-contact between particles and the floor finish under the machine’s weight and movement.
This is counterintuitive but important: an infrequently run robot vacuum can cause more floor wear than one that runs daily, because daily running keeps the grit level at near-zero, while weekly running creates conditions where each session involves more abrasive contact.
What to do: Run your robot on hardwood floors daily or every other day at minimum. A quick daily pass removes grit before it accumulates to a meaningful level. This is one of the most effective things you can do for hardwood floor protection, and it also means the robot is never working against a significant debris load, which is better for the machine itself.
5. Dirty or worn mop pads
If your robot has a mopping function and the mop pad is dirty, you’re not cleaning the floor — you’re dragging a contaminated pad across it. Debris that’s been picked up by the mop pad and not rinsed away becomes embedded in the pad material. On the next run, that debris-laden pad is pressed against the floor surface with the robot’s full weight behind it.
Concerns that vacuum mops scratch floors usually come from trapped debris, not the machine itself. The Mop Pad can scratch a bit when it is full of dirt and debris, but you can avoid this by cleaning/changing the mop pads regularly.
What to do: Clean or replace mop pads on schedule. If your robot has a self-washing dock that washes the mop pads between runs, periodically check the pads to make sure the wash cycle is really cleaning them, and that the pads aren’t wearing out.
Does your hardwood floor type change the risk?
Not all hardwood responds identically to the same cleaning conditions. Understanding your specific floor helps you calibrate how careful you need to be.
Solid hardwood is the most moisture-sensitive, as the planks are a single piece of wood through their full thickness. Swelling from moisture and scratches that cut through the finish into the wood itself are both more consequential because the floor’s long-term integrity depends on maintaining those planks. That said, solid hardwood with a modern polyurethane finish in good condition handles robot vacuum cleaning well with the precautions above.
Engineered hardwood has a real wood veneer over a layered core, which gives it better dimensional stability with moisture changes. The real wood veneer on engineered flooring can be thinner than solid planks, which means protection of the finish is paramount. Engineered floors often feature factory-applied finishes that are extremely hard, but once scratched, they are more difficult to spot-repair than solid wood. Use the same moisture precautions as solid hardwood, and be especially careful with mop pad cleanliness.
Older or refinished floors with worn finish, visible gaps between planks, oil or wax finish (rather than polyurethane), or significant previous wear require extra care. If the floor’s finish is compromised, moisture can penetrate the wood directly. For these floors, disable the mop function entirely and have the floor inspected and refinished before routinely running a robot on it.
High-gloss finishes show micro-scratches more visibly than satin or matte finishes because the reflective surface reveals surface-level abrasion that a lower-sheen finish would absorb visually. For high-gloss hardwood, brushroll softness and wheel cleanliness deserve extra attention.
How to check if your floor finish is safe for robot mopping
The simplest test: place a few drops of water on the floor in an inconspicuous area and observe what happens over 2–3 minutes. If the water beads up and stays on the surface, the floor is sealed and in good condition. If the water is absorbed into the wood, darkening the area, the finish is compromised or absent, and wet mopping of any kind — robot or manual — risks moisture damage. Have the floor resealed before using any mopping function.
Choosing a robot vacuum that’s safe for hardwood
If you’re buying a robot vacuum specifically for hardwood floors, these are the features that genuinely protect the floor:
Rubber wheels throughout. Check that all wheels — including the front caster — are rubber-coated rather than hard plastic. Rubber wheels don’t trap debris in the same way as hard plastic treads, and they don’t concentrate point pressure on debris caught beneath them.
Soft rubber brushroll or suction-only hard floor mode. Either rubber extractors or the ability to disable/retract the brushroll on hard floors is preferable to a hard bristle brushroll for hardwood. The floor does not need mechanical agitation — suction is what matters on smooth surfaces.
Precision moisture control for mopping. If you want mopping capability, look for a robot that allows you to set specific moisture levels rather than just “on/off.” The ability to set the lowest moisture level, or to program the robot to use minimum water on hard floors and more on other surfaces, is a meaningful floor protection feature.
Carpet detection with mop retraction. For mixed homes with hardwood and carpet, automatic mop lifting when the robot detects carpet prevents the reverse problem: a wet mop pad dragged onto carpet. This feature also ensures the robot isn’t applying floor-level moisture in areas where it’s unnecessary.
The maintenance routine that prevents damage
Most hardwood floor damage from robot vacuums is caused not by the machine itself but by neglected maintenance. A well-maintained robot vacuum running on clean, intact wheels with a clean brushroll is genuinely safe on hardwood. Here’s the maintenance schedule that matters:
After every run: Empty the dustbin. A full dustbin reduces suction, which means the robot is picking up less debris per pass — leaving more grit on the floor surface for the wheels and body to contact.
Weekly: Remove and inspect all wheels. Clear any debris from the wheel housings and axle ends. Wipe the wheels themselves with a dry cloth. Inspect the brushroll for wrapped hair or debris. Wipe the underside of the robot with a dry microfibre cloth to remove any accumulated dust and debris from the chassis.
Monthly: Inspect mop pad (if applicable) for wear or debris buildup. Replace if pad material is breaking down. Wipe the sensors on the underside of the robot with a dry cloth — dirty sensors will cause navigation errors that will increase the chances of the robot going over the same area multiple times.
Every 3–6 months: Replace the brushroll if wear is visible. Inspect the wheel material for any cracks or wear that could create sharp contact points. Check that wheel axle covers are secure and haven’t cracked.
What to do if your robot vacuum has already caused scratches
Light surface scratches in the floor’s finish — not deep enough to penetrate into the wood itself — can often be addressed without professional refinishing.
A hardwood floor touch-up pen or marker matched to your floor’s colour fills shallow scratches visibly. These are available at most hardware stores and are matched by wood species and finish colour.
For slightly deeper scratches that have penetrated the finish, a hardwood floor scratch repair kit with fill compound and colour stain can address the area without full refinishing.
For widespread micro-scratching that has dulled the floor’s sheen — a sign of accumulated finish-level abrasion — a professional floor screen-and-recoat (a light abrasion followed by a new topcoat layer without full sanding) can restore the appearance without the cost and disruption of a full refinish.
If you’ve identified the source of the scratching (a wheel with trapped debris, a worn brushroll), address the root cause before running the robot again.
The bigger picture: regular robot vacuuming protects hardwood
It’s worth ending with the broader point that often gets lost in the damage-prevention discussion: tiny particles like dust, grit, and debris act like sandpaper underfoot and dull finishes over time. Regular vacuuming prevents this buildup.
The floors in homes with daily robot vacuum coverage typically show less finish wear over time than those cleaned weekly or less often, because the grit that causes wear with every footstep is continuously removed rather than allowed to accumulate. The risk from a well-maintained robot vacuum is a specific and manageable set of scenarios. The damage from not vacuuming frequently enough is constant and cumulative.
Used correctly, a robot vacuum isn’t a threat to your hardwood floors. It’s one of the most effective tools available for keeping them looking their best for years.
Quick reference: protecting hardwood from robot vacuum damage
| Risk | Cause | Prevention |
|---|---|---|
| Scratching from wheels | Debris trapped in wheel housing | Clean wheels weekly; choose rubber wheels over hard plastic |
| Finish dulling from brushroll | Stiff bristles on high-gloss finish | Use rubber brushroll or suction-only mode on hardwood |
| Moisture damage from mopping | Too much water / unsealed floors | Use lowest moisture setting; test floor seal first; disable mopping on old floors |
| Grit abrasion under the machine | Infrequent vacuuming | Run daily or every other day to keep grit level near zero |
| Scratches from dirty mop pads | Debris embedded in mop material | Clean/replace mop pads regularly; use dock with mop washing |